Deploy a Nuxt.js application on a Plesk Onyx (v)Server as node.js application


Sadly, I started this topic for an Ember.js application a long time ago, and did not finished it. Now my focus switched to Nuxt.js applications, sorry Ember.js.

I am building a Nuxt.js progressive wep application, using express, running on this same server, my ghost blog runs dockerized on. Instead of using docker, I wanted to host this application using Plesk NodeJS feature, starting by git autodeploy support and ending at restarting the NodeJS application.
My server runs on Ubuntu 18.04, Plesk Onyx 17.8 (with Plesk Power Pack Extension) and I choose Node.js 12.4 for my app to run, but Node.js 10.16 or 8.16 will work with Nuxt.js same (I think).
Update 28.08.2019: thx to Boris from devshack.biz I realise that my tutorial relies on a nuxt express app and without express you will get stuck on. So I added the informations Boris gave me.
Update 10.07.2020: @FffabianW gave me the hint, that in step3 it is (now?) `node_modules/nuxt-start/bin/nuxt-start.js`. thx!
Step 1 - install node.js and git support
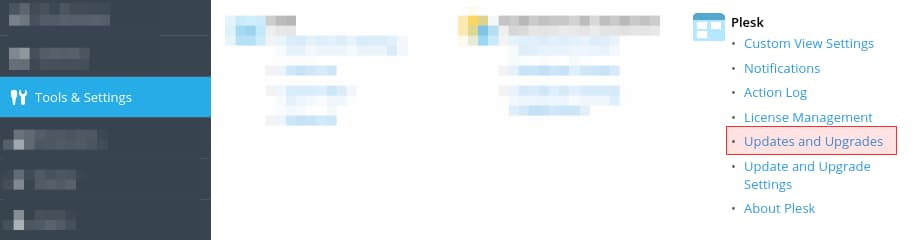
Log into plesk and click on Tools & Settings and choose Updates and Upgrades.
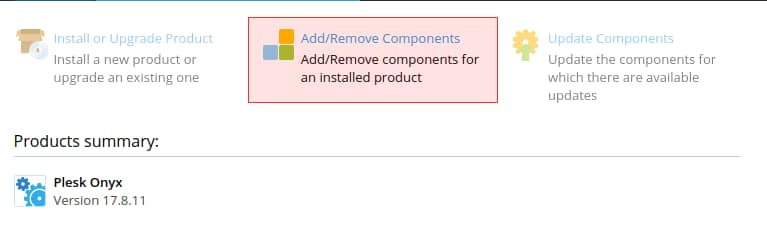
In the new opened tab, click on Add/Remove Components:
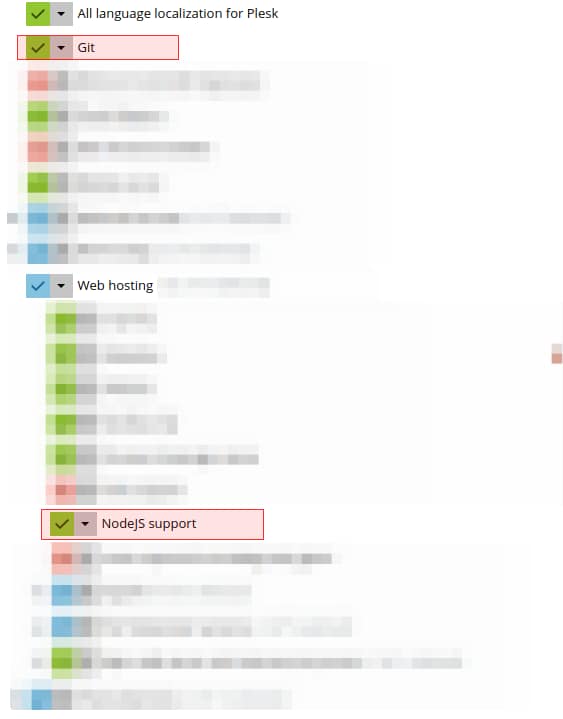
Check Git and expand Web hosting and check NodeJS support:
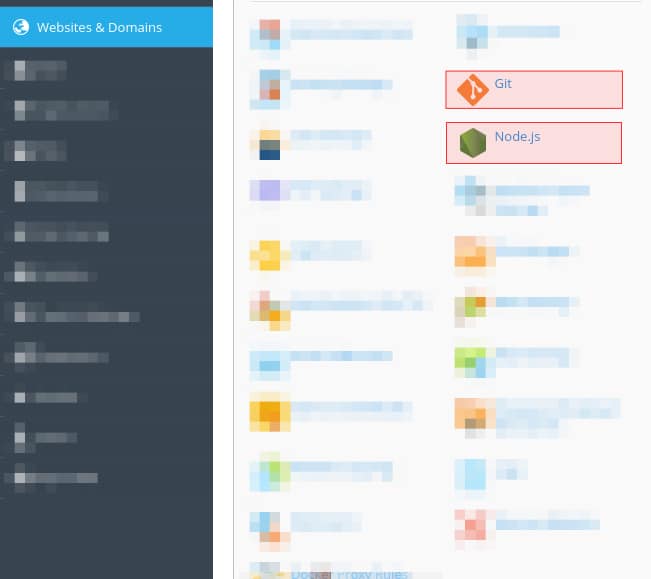
After the installer has finished go back to your Websites & Domains settings and a Node.js icon as well as a Git icon should be visible:
Step 2 - set up git autodeploy for your nuxt.js repository
Create a (sub-)domain you want to deploy your Nuxt.js app to and Enable Git support on creation screen:
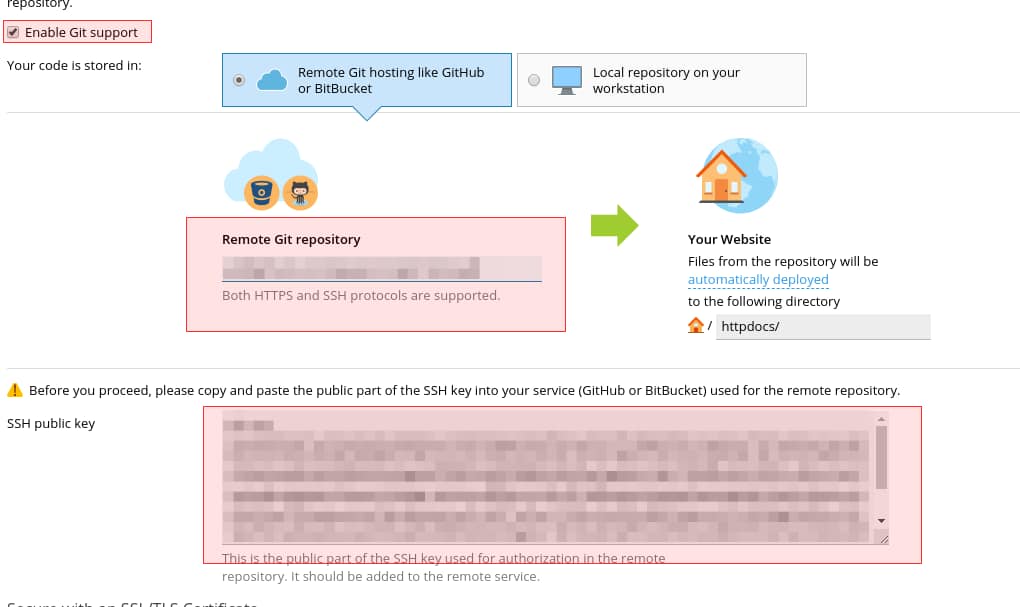
Enter your Remote Git repository url for example git@github.com:bold-ventures/b4f.git. The text in the SSH public key field, goes into your github/bitbucket/gitlab account as a deploy key for this git repository. Click on the button and now your domain settings will look like this:
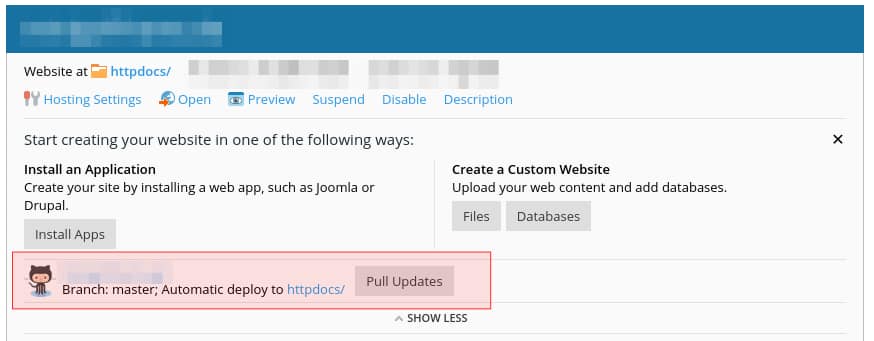
By default the master branch gets autodeployed, I think that is ok. One more step is needed, that your server gets informed on pushes on a specific branch you make, click on your repository name besides Octocat and on the next screen click on Repository Settings:
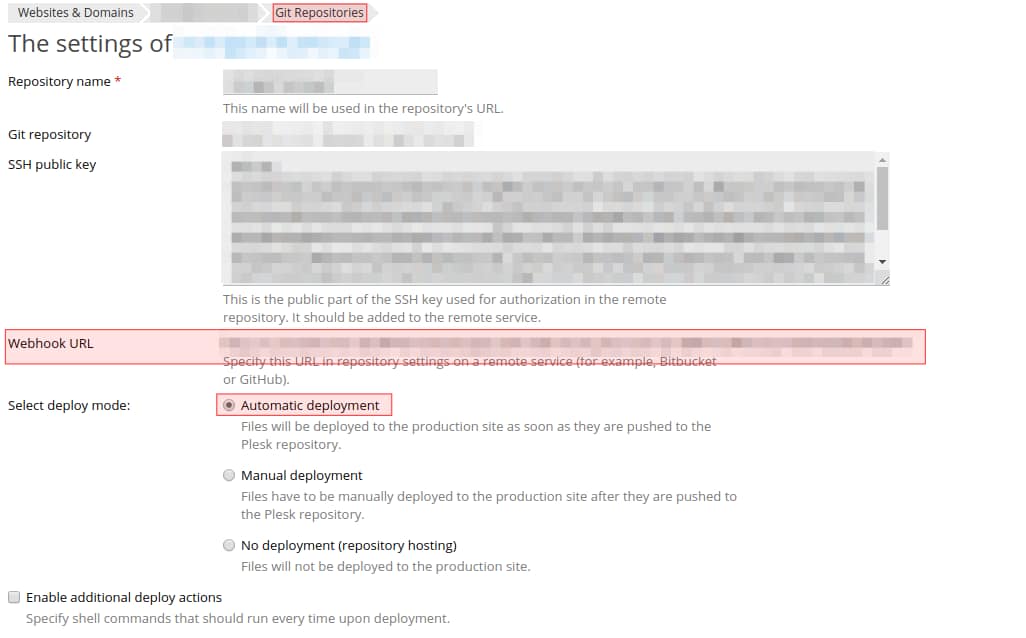
You can see your deploy ssh key here, but more important is the Webhook URL. Copy and paste this URL to your git repository settings under webhooks, so your server gets called when you push a specific branch.
Last step for your auto deployment is behind the checkbox Enable additional deploy actions, check this box and enter the following commands into it:

In this box you need to add the following commands:
/opt/plesk/node/12/bin/npm ci --scripts-prepend-node-path
/opt/plesk/node/12/bin/npm run build --scripts-prepend-node-path
touch tmp/restart.txt
The first command "npm ci" installs all packages that are listed in your package-lock.json. With "npm ci" instead of "npm install" your server loads the same packages as you have on your local machine running. "npm install" will install best matching packages and it can happen that your app runs locally, but not on production.
When you need to use a different Node.js version, you need to adjust the first path.
The second command calls nuxt.js' build function, to create all files, nuxt.js needs to run with.
Last command touches the tmp/restart.txt file, so your node app will be restarted on the next call.
None of these commands should ever be executed as root user or prefixed with sudo!
Step 3 - setup node.js application
Now it is time to click on that Node.js icon on your domain settings overview panel.
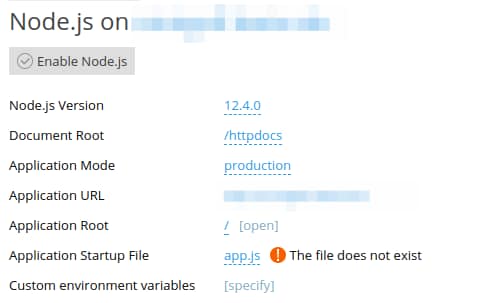
If you click on Enable Node.js not much will happen, you need to set things up.
First set the Application Root to that directory your autodeploy git settings are pointing to. After this, there should appear a new panel on the upper right corner, listing your package.json.
Second step set Document Root to a empty folder inside your Application Root, for example httpdocs/app. Create this directory with Plesk file manager.
On nuxt.js/express apps: Third step set Application Startup File to server/index.js. This file is provided by Nuxt.js.
On nuxt.js/other apps: Third step install nuxt-start npm package and set Application Startup File to node_modules/nuxt-start/bin/nuxt-start.js.
Bonus step: By adding Custom environment variables you can provide variables your application can access via process.env.<variable_name>. For example API_URL would be readable in your application by process.env.API_URL.
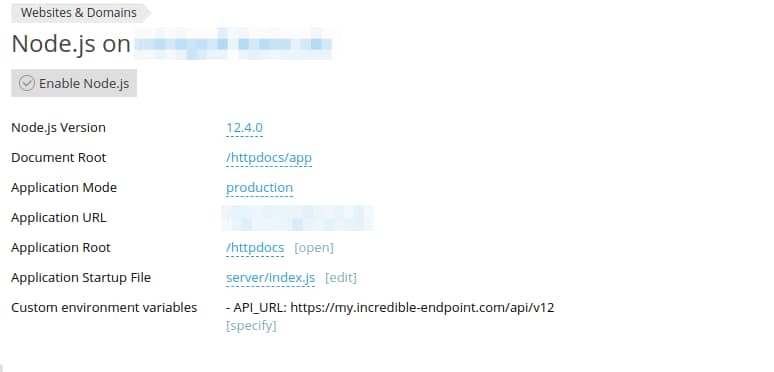
As you are on a public server, make always sure your app starts in production Application Mode.
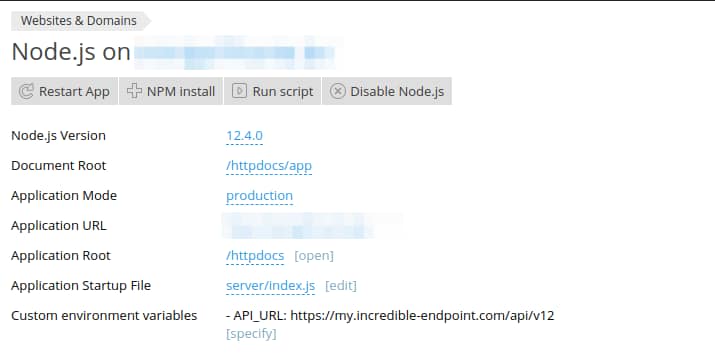
And with this config you can click on Enable Node.js and open your url in a browser. This way nuxt will run in dynamic server side rendered mode. If you have an api within your project it will be served by node.js too.
Troubleshooting
If your browser shows a Passenger Error Page, your node.js app could not start. Best idea is, to run every autodeployment command via Plesk backend, or as your web user directly via ssh.
Mostly package installation might fail, due to missing dependencies on your server or conflicting versions with other packages. By executing npm ci in your ssh shell you will see what is the problem and an internet search will get you running.
As soon as npm ci runs successful, the build command should run too.
Now go out and make the next big thing, driven by nuxt.js on your own vServer.
Article Image from Dan Meyers via unsplash and ghost ❤.