deploy/run/host strapi on plesk obsidian as node application


My last months are really focused on strapi.io topics and what you read here is just the tip of (my strapi) iceberg because I write about my side project(s). My colleagues and I at @bold ventures are working on new and overhauled projects with strapi since may this year and I hope we will find time soon to talk about that on our website.
Short off-topic excursion: In may 2020 we at "bold ventures" started our first project with nuxt.js (multilingual server side rendered frontend) and strapi (headless cms). Since than we started two additional projects with the same setup and are replacing two central database systems with strapi within java environments. You see, strapi is not exclusively for jamstacks.
Back to topic: I am switching my band website from a nuxt.js/express.js setup to a nuxt.js/strapi setup - both running on the same plesk vserver.
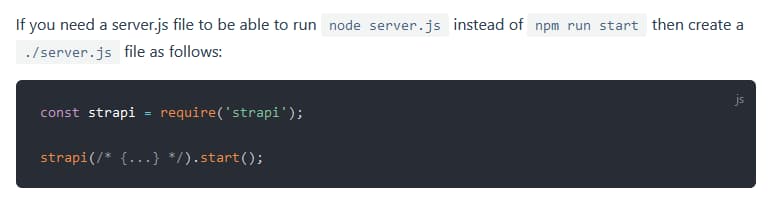
One key information for hosting strapi on a plesk server is written in strapi documentation:
This blog post describes all steps you need to make use of the information above to host a strapi installation for production use on a plesk obsidian vserver.
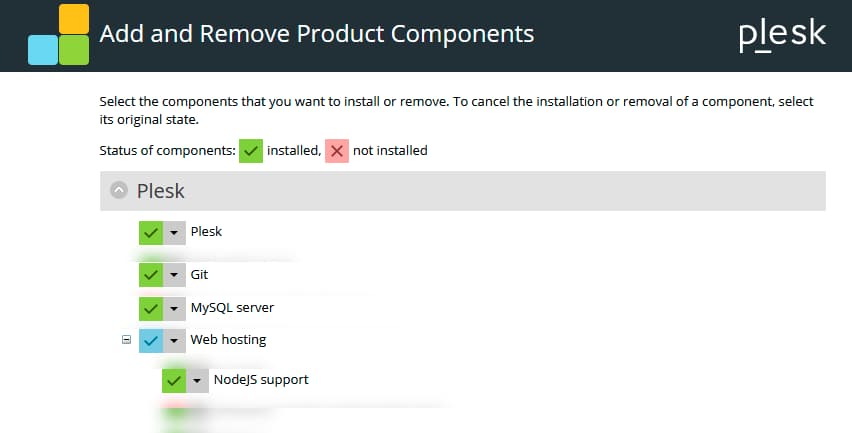
system requirements
The plesk server needs the Git, NodeJS and MySQL. I will run strapi with node.js 12.4.0 - this is the newest nodejs version plesk provides.
preparations
I need to setup:
* a git repository to store strapis code in
* a (sub-)domain I want to run strapi in
* a mysql database
git repository setup
I use github for code hosting, but bitbucket, gitlab or others will work same.
I create a git repository and push a new strapi installation into it:
$ npx create-strapi-app plesk-strapi --quickstart --no-run
$ # wait for installation process to finish
$ cd plesk-strapi
$ npm run build
$ git init
$ git checkout -b main
$ git add .
$ git commit -m "initial strapi"
$ git remote add origin git@github.com:djpogo/strapi-plesk.git
$ git push -u origin main
I use --quickstart option because for local development I want to use a sqlite database. With that setup local development requires only a working node.js instance, a configured .env file and than it is a "checkout and run". If you want to use mysql (or sqlite) for local development and production use, you can configure that in the .env file with the DATABASE_CONNECTION_NAME key.
Add mysql support to the strapi installation:
// in project root folder
$ npm install mysql --save
Set up two database connections one named sqlite and one named mysql:
// config/database.js
module.exports = ({ env }) => ({
  defaultConnection: env('DATABASE_CONNECTION_NAME'),
  connections: {
    sqlite: {
      connector: 'bookshelf',
      settings: {
        client: 'sqlite',
        filename: env('DATABASE_FILENAME', '.tmp/data.db'),
      },
      options: {
        useNullAsDefault: true,
      },
    },
    mysql: {
      connector: 'bookshelf',
      settings: {
        client: 'mysql',
        host: env('DATABASE_HOST'),
        port: env.int('DATABASE_PORT'),
        database: env('DATABASE_NAME'),
        username: env('DATABASE_USERNAME'),
        password: env('DATABASE_PASSWORD'),
        ssl: env.bool('DATABASE_SSL', false),
      },
      options: {}
    }
  },
});
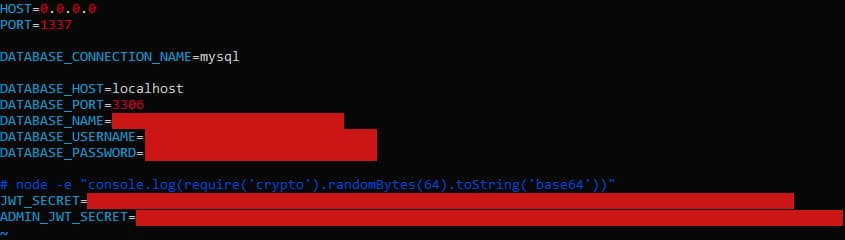
All credentials and other secrets are stored in a .env file you create in your workspace and on the server. As a blueprint for this file you add a .env.example with an empty configuration:
// .env.example
HOST=0.0.0.0
PORT=1337

# `sqlite` or `mysql`
DATABASE_CONNECTION_NAME=

DATABASE_HOST=
DATABASE_PORT=
DATABASE_NAME=
DATABASE_USERNAME=
DATABASE_PASSWORD=

# node -e "console.log(require('crypto').randomBytes(64).toString('base64'))"
JWT_SECRET=
ADMIN_JWT_SECRET
Create a folder document.root including a .gitkeep file, this folder is needed for plesk node.js configuration later:
// in your project repository root folder
$ mkdir document.root
$ touch document.root/.gitkeep
$ git add document.root
$ git commit -m "add document root for node js plesk configuration"
$ git push
And last preparation is to add a server.js file in your project root, having the two lines of code the strapi documentation told us before:
// server.js
// @see https://strapi.io/documentation/v3.x/getting-started/deployment.html#application-configuration
const strapi = require('strapi');

strapi(/* {...} */).start();
strapi domain setup
I use a subdomain cms.raoulkramer.de to host strapi:
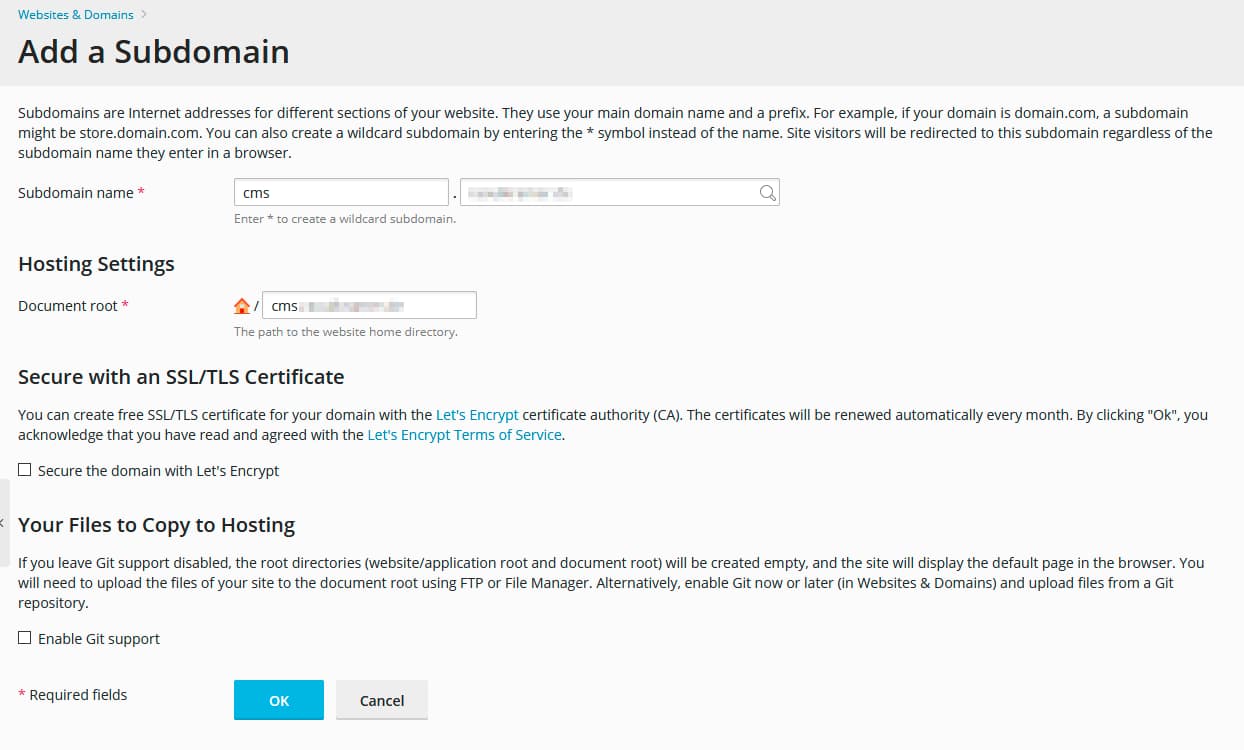
At this point I do not enable SSL or GIT support, to let this step be as short as possible.
domain ssl settings
In my setup (http/2 hosting, frontend application and strapi on the same server) it is important to use the same SSL certificate for both applications. Let's Encrypt offers wildcard certificates for free, so setup a wildcard certificate for your main domain and configure your strapi subdomain to use the same certificate. Different certificates may lead into a HTTP 421 error, when your visitors browser try to reuse the HTTP connection it build up to your main domain to access strapi too.
If you host strapi on a different server, or not with http/2 you can use different SSL certificates for your applications. Either way SSL should be used.

subdomain git repository settings
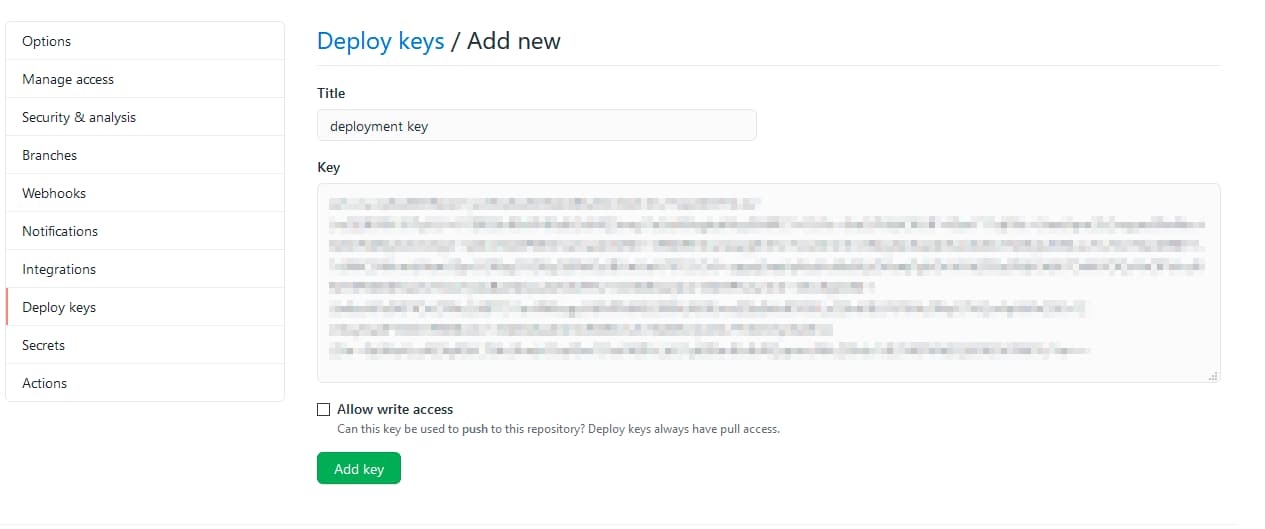
After creating and securing the subdomain, click on "Git" on the subdomain settings and configure your git repository:
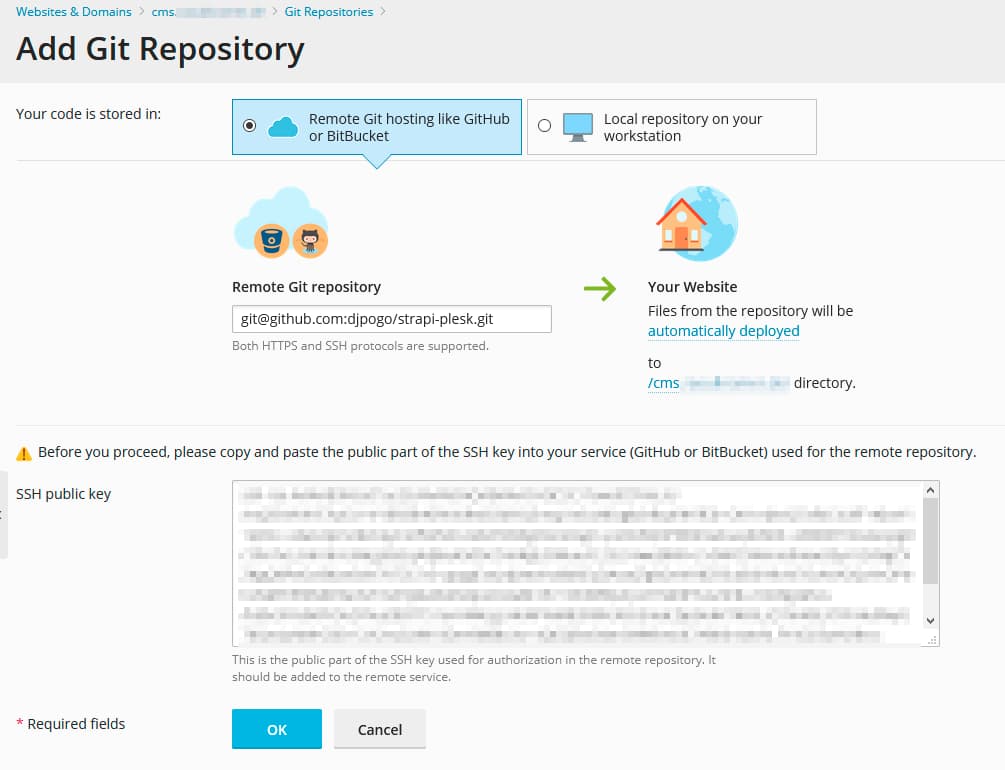
Copy the SSH public key and add this to your github repository as a deploy key, otherwise your plesk server will not be able to fetch your code from your repository.
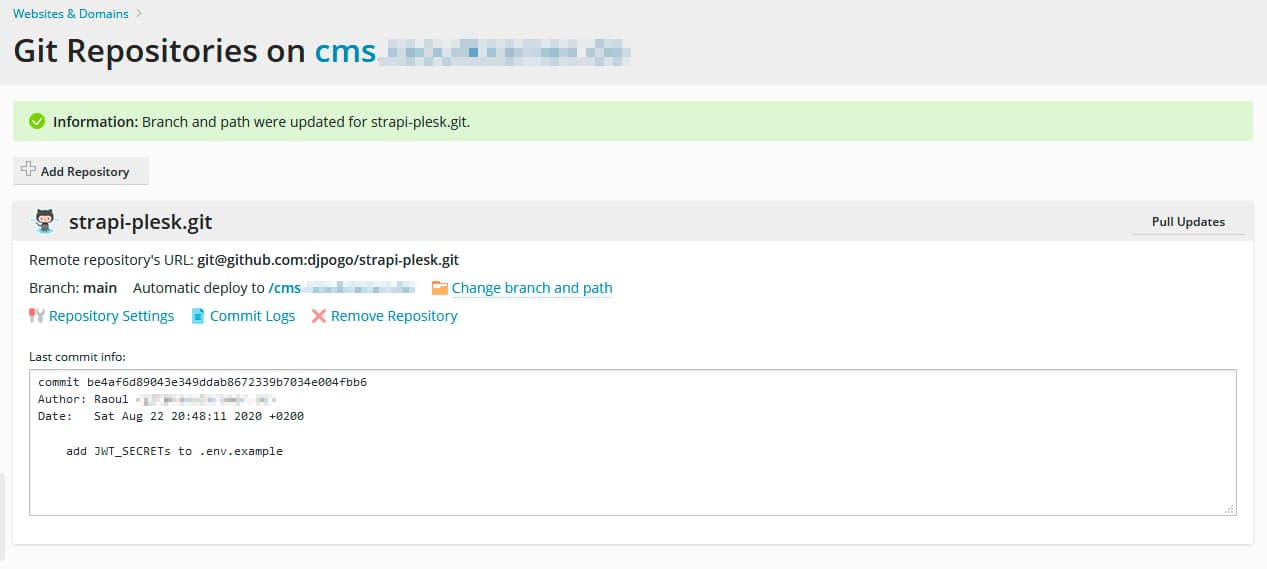
Finally click on OK in plesk and see if everything works:
Next step: production database.
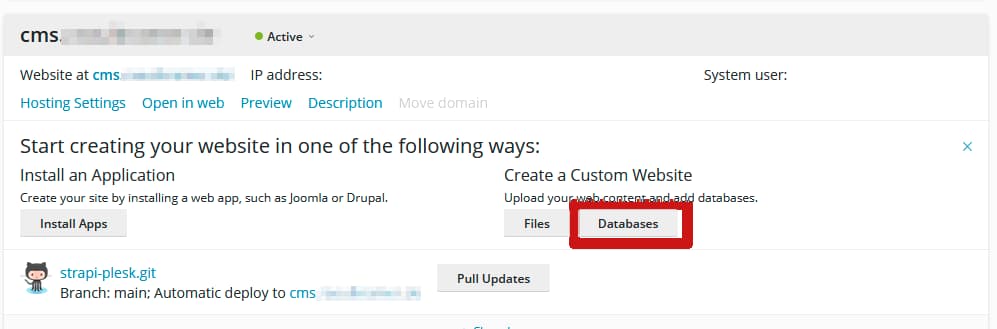
production database
Back to plesk subdomain settings and click on Databases:
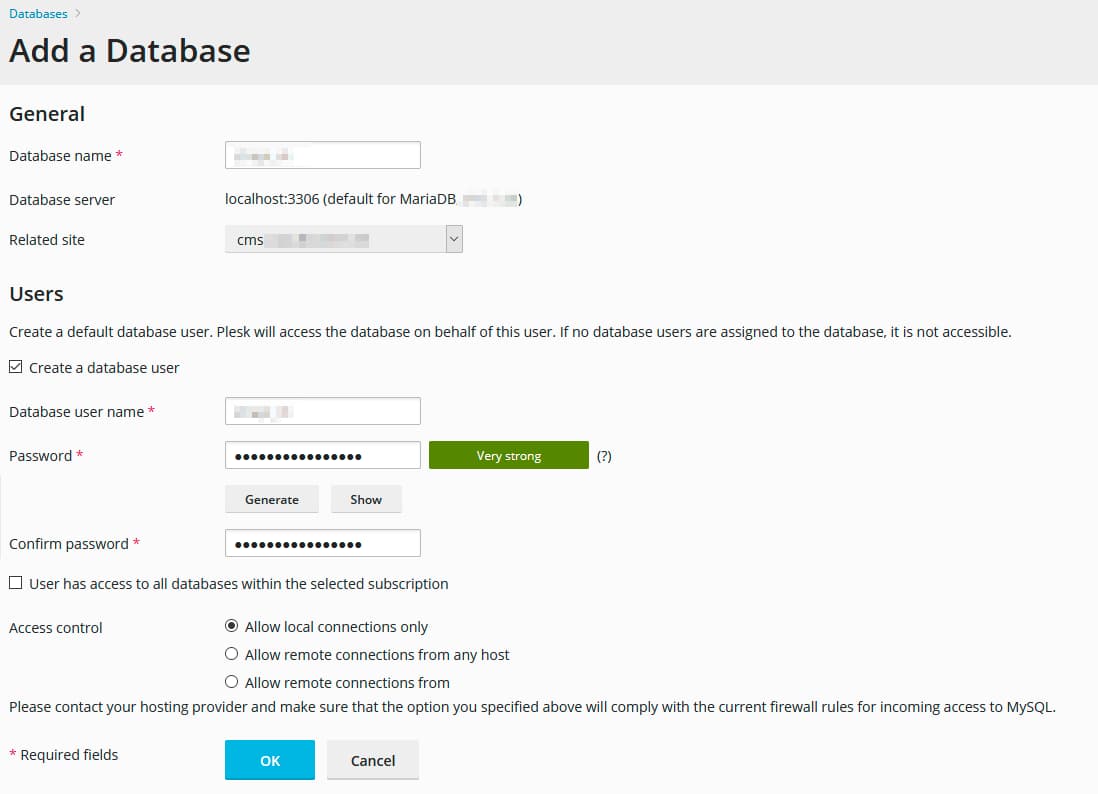
Make sure to write down db name, user and password, it is needed in the next step.
configure production hosting
Now it is time to connect via ssh on to the server to configure strapi for production hosting. Let us copy .env.example to .env and fill in the blanks:
$ ssh your-web-user@your-domain.tld
$ cd cms.<folder>
$ cp .env.example .env
$ vim .env
Let's get strapi starting.
running strapi as a plesk node application
At this point I connect again via ssh to the server and execute the following commands in the project directory - on the one hand we need these commands for automatic deployments and on the other hand it is a good "dry run" to see if node and npm will run on your server:
# execute this commands in your project working directory, where package.json and package-lock.json are stored.
$ /opt/plesk/node/12/bin/npm ci --scripts-prepend-node-path
$ NODE_ENV=production /opt/plesk/node/12/bin/npm run build --scripts-prepend-node-path
Back to plesk and click on the "Node.js" button in subdomain settings:
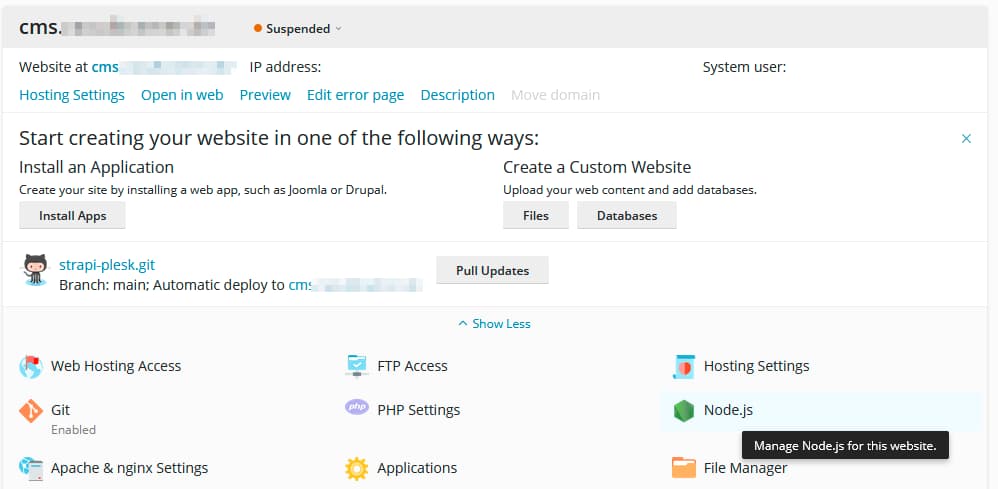
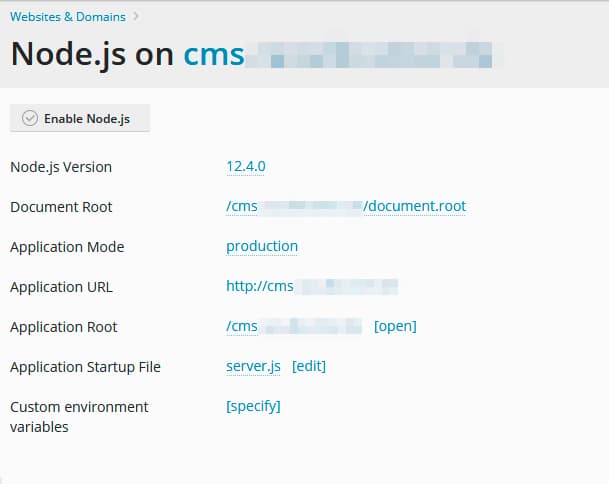
Set up Document Root to the /cms.<your-folder>/document.root directory, Application Root to /cms.<your-folder> and Application Startup File to server.js.
Node should run in production mode and than click on ✔ Enable Node.js. Make sure you set up SSL for this subdomain, because you will now create a superadmin user and this credentials should only go over secure connections.
setup deployment
We successfully connected the repository with plesk, so we can pull updates by a single click in plesk, but nothing else.
I want to setup plesk the way that clicking "Pull Updates" at sub domain settings, plesk will pull updates from the git repository and run npm ci, npm run build and restart the node.js server process.
Go to the git repository settings and open the settings dialog. Enable at the end of the page Enable additional deploy actions and enter these commands into the textarea:
/opt/plesk/node/12/bin/npm ci --scripts-prepend-node-path
NODE_ENV=production /opt/plesk/node/12/bin/npm run build --scripts-prepend-node-path
touch ./tmp/restart.txt
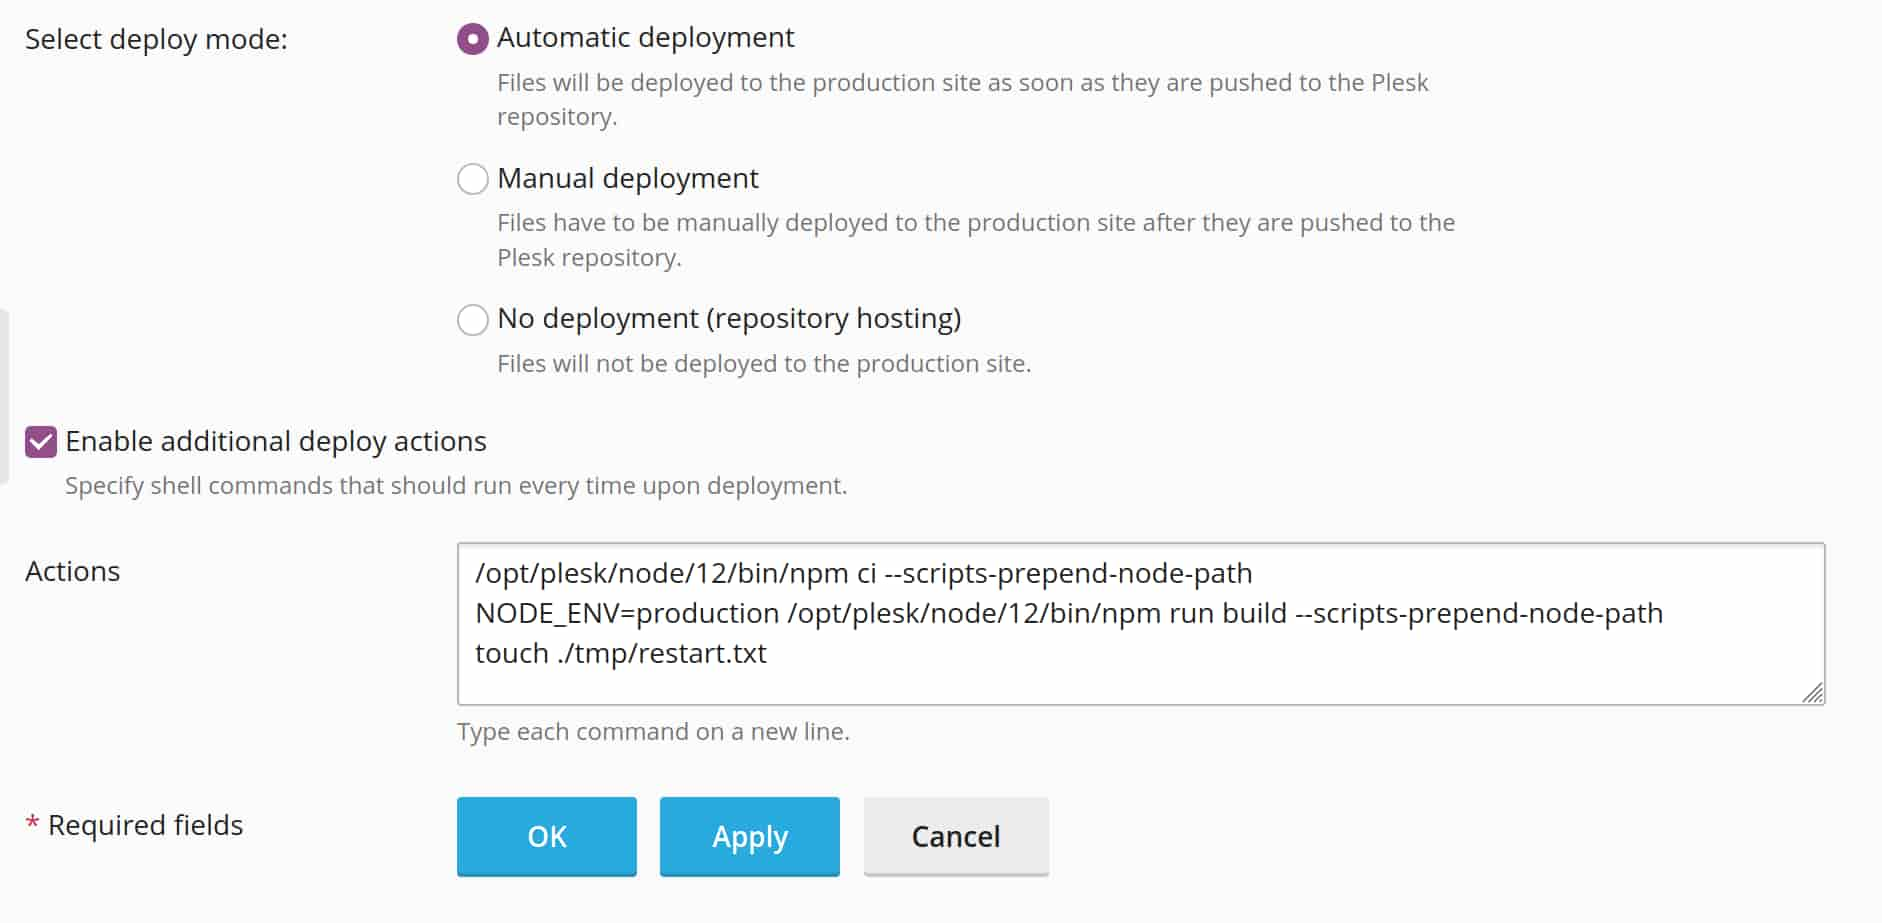
First line installs every package listed in the package-lock.json.
Second line (re)builds the admin panel.
Third line tells plesk to restart the node server process.
Every time Pull updates is clicked, these three commands will be executed and deploy the actual strapi.
that's it
Have fun with your strapi installation on a plesk server. My strapi-plesk repository is available at github. For this tutorial I ran exactly this code on my vServer. If you run into trouble during the process you can check it out.
The domain cms.raoulkramer.de was only set up up for this blog post. Don't get confused when you try to reach it and it is not answering/working.
Article Image by Claudio Testa via unsplash and ghost ♥